This is a step-by-step guide for properly setting up a custom domain.
Step 1
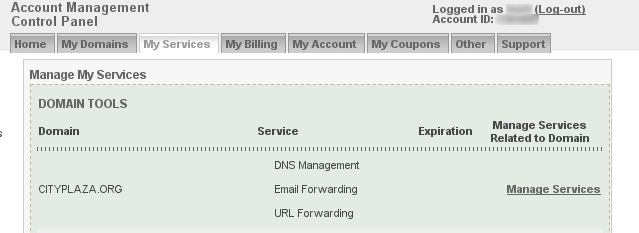
First, click on the My Services tab. If it says that there are no available services, then you must do the following:
-
Click on My Domains
-
Check the box by the domain you are using with WikiSpot.
-
Click on the drop-down menu in "Step 2: Select Domain Management Task".
-
Select "Add Services" for selected domain. Press "Go".
-
On the next screen, click on the "Domain Tools Bundle" to add it to your cart. As of writing this guide, it is free. You will not be charged.
-
Press "Continue"
-
On the next screen, ensure that "Domain Tools Bundle" is listed to the right, review the service agreement, decided whether or not you agree to it, and click on "Complete Order".
-
You may now return to domain management and click on the My Services tab.
Step 2
Select the "Manage Services" button that is beside the domain being used for your wiki. 
Step 3
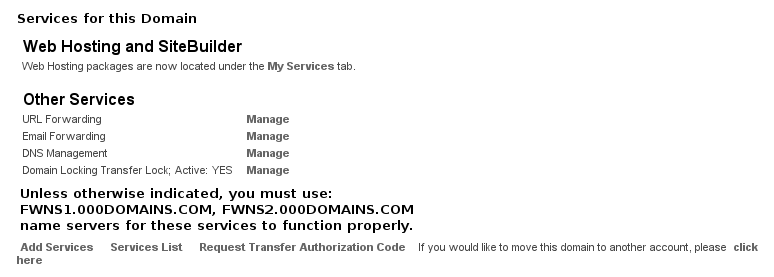
Scroll down and look for "DNS Management" and click on "Manage". 
Step 4
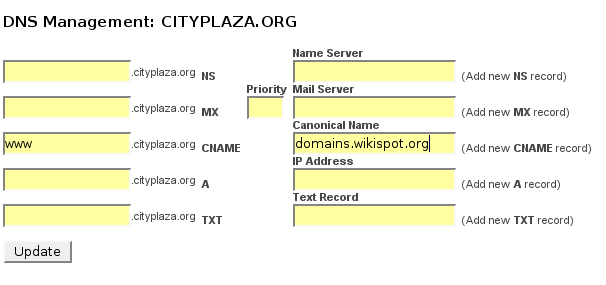
Find the row that represents the "Canonical Name" or CNAME. If you want the wiki to be available at www.yourdomain.com, take a look at the following screenshot. Note that www can be replaced with anything else you desire. Click Update and you'll see the a new CNAME entry. 
Step 5
Click on the My Services tab, then click again on "Manage" next to the appropriate domain.
Step 6
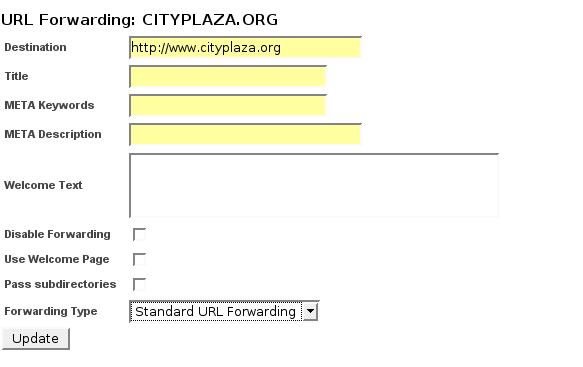
Scroll down to the bottom and look for URL Forwarding. Click "Manage".
Step 7
In the Destination textbox, enter www.yourdomain.com. Remove the text for Title and select Standard URL forwarding. Click "Update". 
Step 8
Update your domain's DNS servers as specified on the page where you edited your CNAME. As of writing this, they suggested the following DNS servers:
-
NS1.NAMERESOLVE.COM
-
NS2.NAMERESOLVE.COM
You're Done!
At least, you should be. The writer of this guide couldn't actually test if the procedures worked. Do change this paragraph if it does!


